DEVONthink (DT) is a document management software with a companion app for i*OS. It has a comprehensive scripting dictionary which makes it attractive and easy to automate. Most publicly available examples are in AppleScript, the following scripts show how to achieve some goals with JXA.
Note that before DT version 3.8 the examples here will not run as scripts in smart rules. From DT 3.8, you can use them as smart rule scripts by enveloping the code in
function performsmartrule(records){ //code goes here }Here,
recordsrefers to the records selected by the smart group condition(s), so there’s no need to useapp.selectedRecords()in a smart rule script.
Use a script in a smart rule and stand-alone#
DEVONthink provides an automation function named “smart rules”. With them, you can specify criteria to select documents, then define events that trigger a set of actions. Part of these actions can be (JXA) scripts. Such a script looks like this
// Loop over records in a DEVONthink smart rule script
function performsmartrule(records) {
const app = Application("DEVONthink 3");
records.forEach(r => {
/* do something with the records matching the
smart rule's condition */
})
}Please take note that the parameter of performsmartrule is a JavaScript array, not an Object Specifier. Therefore, you can use forEach and all other array methods directly on it.
You might be tempted to add the following line at the end of your script code to make it work in script editor or other environments as well as in DEVONthink:
(() => performsmartrule(Application("DEVONthink 3").selectedRecords()))()DO NOT DO THIS The anonymous function will always be executed, even in a DEVONthink smart rule. That causes the
performsmartrulefunction to be executed twice, which int turn might give unexpected results.
However, you can use an anonymous self-executing function if it first checks that it’s not running inside of DEVONthink:
// Make a DEVONthink smart rule script work in Script Editor
(() => {
if (currentAppID() === "DNtp") return;
const app = Application("DEVONthink 3");
performsmartrule(app.selectedRecords());
})()
function currentAppID() {
const p = Application.currentApplication().properties();
return Application(p.name).id();
}Rename records with regular expression#
DT comes with a script to rename selected records
using a regular expression. It is based on the command line
utility sed which tends to complicate things because of
problems with quoting parameters and file names. The JXA
script performs the same task without resorting to an
external program. In addition, it shows the user the regular
expression they entered in the first step when asking for
the replacement string and displays the number of selected
records.
// Rename DEVONthink records with regular expression
(() => {
const app = Application("DEVONthink 3");
app.includeStandardAdditions = true;
const selection = app.selectedRecords();
if (selection.length > 0) {
const suffix = selection.length > 1 ? "s" : "";
/* Set title to display # of selected records */
const title =
`Change name${suffix} for ${selection.length} record${suffix}`;
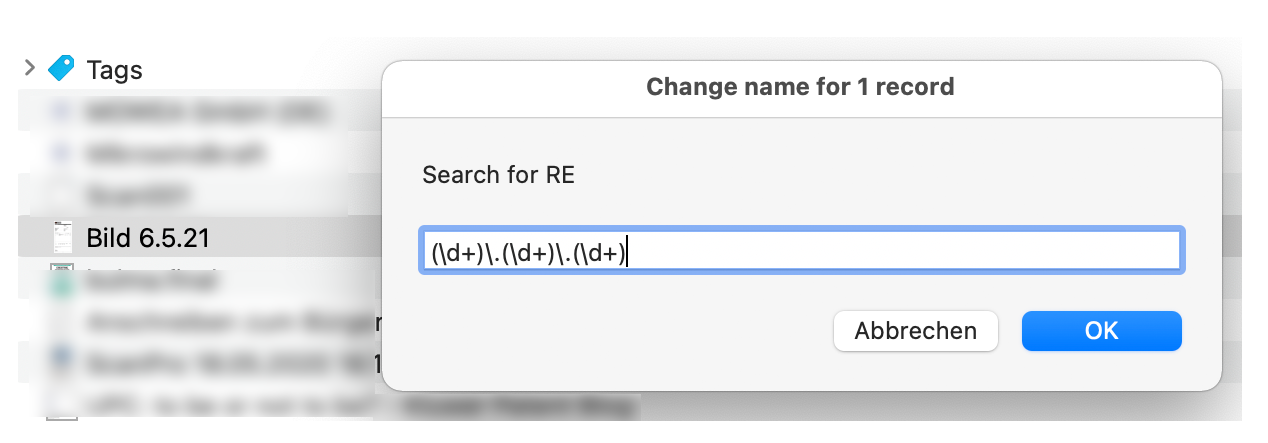
/* Ask user for RegExp, stop if empty string */
const searchFor = app.displayDialog("Search for RE", {
withTitle: title,
defaultAnswer: "",
});
if (searchFor.textReturned === "") return;
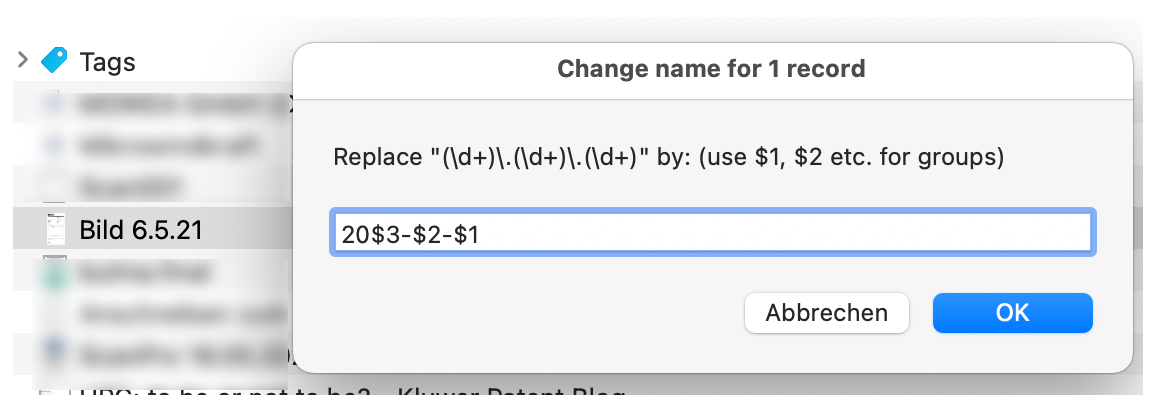
/* Ask user for replacement, showing the RegExp they entered */
const replaceWith = app.displayDialog(
`Replace "${searchFor.textReturned}"`+
`by: (use $1, $2 etc. for groups)`,
{ withTitle: title, defaultAnswer: "" }
);
const re = new RegExp(searchFor.textReturned);
const reText = replaceWith.textReturned;
/* Change names of all selected records */
selection.forEach((record) => {
record.name = record.name().replace(re, reText);
});
} else {
app.displayAlert("Please select at least one record.", {
withTitle: title,
});
}
})();You can see the script’s dialog boxes and result in the next three screen shots.
Add CSS link to Markdown records#
All Markdown processors use a user-defined CSS stylesheet if they see the appropriate definition at the top of the document, for example as a link element. The following script inserts the link to a CSS file at the top of the currently selected records. It does so by referring to the URL of a record in DT (cssURL). This document should of course contain the CSS definition you want to apply. You can get this URL by selecting “copy link” from the record’s context menu. Using a DT record as stylesheet is not strictly necessary, but it ensures that DT can always display your Markdown files in the way you want.
// Insert link to external CSS in Markdown documents (DEVONthink)
(() => {
/*
* set cssURL to the x-devonhink-url of the CSS file you want to use.
* It must point to a record in one of your DT databases.
*/
const cssURL =
"x-devonthink-item://0841105D-70B7-4518-8E2C-68E25CF8FC38";
const app = Application("DEVONthink 3");
const stylesheet = `<link rel="stylesheet" href="${cssURL}" />`;
/*
* Loop over all selected records that are of type Markdown
*/
app.selectedRecords
.whose({ _match: [ObjectSpecifier().type, "markdown"] })()
.forEach((r) => {
const src = r.plainText();
r.plainText = `${stylesheet}\n\n${src}`;
});
})();DEVONthink 3 caches the style sheets, and I have no idea why. But that means that you have to restart DT in order to see changes to your style definitions.
Add table of content to Markdown records#
Post processors for MultiMarkdown, the dialect supported by
DT, generate a table of content if they see {{TOC}} in the
Markdown document. The next script adds this marker to all
currently selected Markdown records.
// Add table of content to Markdown records in DEVONthink
(() => {
const app = Application("DEVONthink 3");
/*
* Regular expression to find
* at least one # sign at the start of a line,
* followed by a space
*/
const headline = new RegExp("^#+ ", "m");
/*
* Loop over all selected Markdown records
*/
app.selectedRecords
.whose({ _match: [ObjectSpecifier().type, "markdown"] })()
.forEach((r) => {
const src = r.plainText();
/* Find first headline in document */
const found = src.match(headline);
if (found) {
/*
* Start position of first headline in text
*/
const position = found.index;
/*
* Rebuild the text from
* - first part of it (before the first '#')
* - {{TOC}} marker
* - rest of the text (from the first '#') to the end
*/
r.plainText = `${src.substring(
0,
position
)}\n\n{{TOC}}\n\n${src.substring(position)}`;
}
});
})();This is a bit more complicated than the previous example, because the TOC marker has to be inserted right before the first headline. This is not a Markdown requirement but since you don’t know if there’s something else before the first headline that must stay at its place (e.g. the link to a CSS file), it is safer to put the TOC right before the first headline.
To do so, the script has to split the original text at the
position of the first headline and reassemble it by adding
the TOC marker between the two parts. Alternatively, you could
use replace like so:
src.replace(found[0],`${found[0]\n\n{{TOC}}\n\n`);
Copy hashtags to DT tags#
This issue arose in the DT user forum: Someone had hashtags embedded in their Markdown records and wanted to copy them to the record’s DT tags. That is what the next script does for hashtags like “#xxx”. Those can not be confused with Markdown headlines which look like “# xxx”: there’s a blank between the pound sign and the text.
// Copy hashtags from Markdown record to DEVONthink tags
(() => {
const app = Application("DEVONthink 3");
app.selectedRecords
.whose({ _match: [ObjectSpecifier().type, "markdown"] })()
.forEach((r) => {
/*
* Find hashtags in text.
* matches contains array for each match:
* [ ["#hash1", "hash1", index1 …]
* ["#hash2", "hash2", index2 …]
* …
* ]
*/
const matches = [...r.plainText().matchAll(/#([^# ]+)/gm)];
/*
* Build array of hashtags
*/
const newTags = matches.map((m) => m[1]);
/*
* Merge old and new tags and set newTags
*/
r.tags = [...newTags, ...r.tags()];
});
})();The script loops over all currently selected Markdown records. For each of them, it finds all hashtags, i.e. strings beginning with “#” and followed by anything that is neither a blank nor a “#” sign. It then extracts the tags proper, i.e. the part after the “#” into the array newTags and merges this with the old tags (r.tags()), using JavaScript’s spread syntax (...). Finally, it assigns this new array to the record’s tags property.
You do not have to worry about assigning the same tag twice: DT takes care of that internally, so even if the new tags contain one or more of the already existing tags for this record, all of them will appear only once.
Add tags from CSV file to records#
You can also store tags to add to DT records in an external file, for example in CSV format. that means “comma separated value”, though this is something of a misnomer nowadays: you can use tabs as well as semicolons as a separator between fields, too. These files can be exported by spread sheet programs like Excel, Numbers and Open/LibreOffice Calc.
Suppose your original data looks like this in a spread sheet program:
| Name | Tags |
|---|---|
| first name | tag1, tag2, tag3 |
| second name | tag4, tag5 |
So the name of the record is stored in the first column, the tags to assign to it in the second one.
You can import CSV files directly into DT where they are aptly called “sheets”. To access the table data itself, you use the cells property which contains an array of rows, each of which is again a row with the cells.
// Add tags from CSV file to DEVONthink record
(() => {
const docUUID = "3814468E-F9C7-4332-80CA-B42C8A321926";
const app = Application("DEVONthink 3");
app.includeStandardAdditions = true;
const db = app.currentDatabase();
const tableRecord = app.getRecordWithUuid(docUUID);
/*
* Get the cells from the sheet record
* cells = [ * 1st row * [column1, column2]
* 2nd row * [column1, column2]
]
*/
const cells = tableRecord.cells();
cells.forEach((row, i) => {
const name = row[0],
tags = row[1].split(",");
const record = db.contents[name];
try {
record.tags = [...record.tags(), ...tags];
} catch (Error) {
app.displayAlert(`Record "${name}" not found on line ${i + 1}.`, {
withTitle: "Set tags from sheet",
});
}
});
})();If there’s an error in the record’s name, the script will run into an error. It tries to catch this, but there’s no possibility to reliably get the reason for the error. So the script simply assumes that a wrong record name caused it and displays the name as well as the line in the sheet document.
Create archive from selected records#
If you need to send DT records to someone else, it might be useful to pack them in a ZIP archive: they remain together and are compressed, so take less room when sending an storing. That’s what the next script does: It takes the selected records and packs them in an archive, whose name the user chooses interactively. The records are stored with their bare name only, not their full path on the disk. That makes it easier to unpack them later to another location.
This script uses a simple regular expression to protect
special characters like quotes and spaces in file names. It
is equivalent to AppleScript’s quoted form of… command:
filename.replaceAll(/'/g, "'\\''")
If you want to send the archive attached to an e-mail, please see the example for sending an e-mail
// Create archive from selected DEVONthink records
(() => {
const app = Application("DEVONthink 3");
app.includeStandardAdditions = true;
const dialogTitle = "Create archive from records";
/*
* curApp needed to use doShellScript
*/
const curApp= Application.currentApplication();
curApp.includeStandardAdditions = true;
/*
* Get the paths of the selected records
*/
const paths = app.selectedRecords.path();
if (paths.length === 0 ) {
app.displayAlert("Please select at least one record",
{withTitle: dialogTitle});
return;
}
/*
* Ask user for target archive name
*/
const suffix = paths.length > 1 ? "s" : ""
let zipPath = app.chooseFileName({
withPrompt: `Save ${paths.length} file${suffix} in archive at:`,
withTitle: dialogTitle
});
if (!zipPath || zipPath === "") {
app.displayAlert("Archive name must not be empty",
{withTitle: dialogTitle})
}
/*
* Append .zip extension if necessary
*/
if (! /\.zip$/.test(zipPath)) {
zipPath += ".zip";
}
/*
* Quote all special characters, equivalent to
* AppleScript's "quoted form" for strings
*/
const pathList = paths.map(p => {
return `'${p.replaceAll(/'/g, "'\\''")}'`;
});
/*
* Build and execute zip command for shell
*/
const zipCommand = `zip -j '${zipPath}' ${pathList.join(' ')}`;
curApp.doShellScript(zipCommand);
})()Move PDFs into groups according to content#
Some people use DT to store regularly arriving PDFs like invoices and account statements. Usually they run character recognition if necessary, apply a certain naming convention to the files, set some tags and then move them to certain groups.
Although DT provides smart groups to handle all these steps, those have one disadvantage: A single smart rule can’t set tags dynamically (i.e. depending on the file’s content) nor move to a group determined at runtime. Suppose you’re receiving account statements from two banks and want to tag them with “private” and “business” respectively and move them into groups “City Bank” and “BoA” – then you need two smart rules, one for each group.
Of course, if you’re not only trying to shelve bank statements but also invoices in different groups and with different tags, you’ll end up with one smart rule per tags/group combination. Which is not practical. But smart rules can execute JXA scripts since DT 3.8. So here’s a script that
- checks PDFs for a text layer and adds one if it’s not already there
- searches for a set of predefined keys in this PDF
- if it finds one
- extracts some information from the text
- from which it builds a standardized file name
- adds tags predefined for this key
- and finally moves the file to a database/group defined for this key
The complete script is available here. Since it’s quite long, I’ll only show the more interesting parts here.
The procedure is setup around the object uidMap (not a very good name, but there we are). It looks like this:
{
key1: {handler: handlerForKey1,
tags: ["tag1", "tag2"], db: "database1", group: "group1"},
key2: {handler: handlerForKey2,
tags: [], db: "database2", group: "group2"},
…
}The keys should be chosen so that they uniquely identify the different documents. You can use regular expressions for them (see the code for an example). For example, you might use your customer number for invoices or your account number for bank statements and so on. The tags array need not be present, in which case an empty set of tags will be assigned to the record. db and group are the names of the database/group to which the record is finally moved.
The handler function expects three parameters:
- the key
- the DT record
- and the text of this record
Since the key is passed into it, you can use one handler for similar kinds of files, for example all bank statements or all telecom invoices. In fact, you could process all documents with a single handler, although you’ll probably end up with a monster.
The handler function returns an object with three properties:
company: that could be the name of your bank or the number of the bank statement or the name of the firm you received an invoice fromdate: the date extracted from the text of the document in ISO format, i.e. yyyy-mm-ddsubject: additional information like the invoice number
These properties are then used by the function calling the handler to build a filename of the form company date subject. This is of course completely arbitrary. You could just as well have the handler return the complete file name or decide to not change the file name.
An example handler function, dealing with invoices from Deutsche Telekom for fixed and mobile lines, looks like this:
function handleTelekom(key, r, txt) {
/* extract date from the invoice */
let rawDate =
txt.match(/Datum\s+(?:Rechnungsnummer\s+)?(\d+)\.(\d+)\.(\d+)/);
/* if date not found, e.g. because of poor OCR,
and mobile invoice, take it from the file's name */
if (!rawDate && key === "Mobilfunk-Rechnung" ) {
rawDate = r.name().match(/Rechnung_(\d{4})_(\d\d)_(\d\d)/);
/* Build the rawDate array in the form [0, d,m,y]
since that's what the following lines expect
*/
rawDate = [0, ...rawDate.reverse()];
}
/* get the billing month als [..., monthname, year] */
const rawMonth = txt.match(/IHRE RECHNUNG FÜR\s(\p{L}+)\s+(\d+)/ui);
/* Must use Unicode category because of umlauts */
/* convert the raw date to ISO (yyyy-mm-dd) */
const dateStr = paddedDate(rawDate[3], rawDate[2], rawDate[1]);
/* initialize the subject string to "fixed line" or "mobile" */
let subject = /Mobilfunk/.test(txt) ? "Mobilfunk " : "Festnetz ";
/* if the billing month is available append its
numerical form to the subject like
mm-yyyy */
if (rawMonth) {
const monthName = rawMonth[1].substring(0,1) +
rawMonth[1].substring(1).toLowerCase();
subject +=
`${("" + (localMonths.indexOf(monthName)+1)).padStart(2,"0")}`
subject += `-${rawMonth[2]}`;
}
const resultObj = {company: "Telekom", date: dateStr, subject: subject};
return resultObj;
}The tricky part is to find the date. That usually works ok with PDFs containing a text layer in the first place. However, if they were OCRd, this might not work reliably. In the example above, the handler is extracting the date from the file name if it doesn’t find it in the text. In addition, date formats vary widely. That was one reason to split the work into different handlers so that each one could take into account a particular kind of text format. To use this script in a smart rule, the rule should watch the global inbox. It should be triggered on import and after sync and select all PDFs whose tag is not “ignore_me”. Then the first action of the rule should be to set the for the record to “ignore_me”. You can choose whatever tag name you want, as long as they are identical in the selection and action part of the smart rule. The script will replace the tags for those records it processed. The second action should be “Execute Script” with an internal JavaScript. Copy the (modified!) script code into the editor. Since the script sets the tags for all records it modifies, you’ll easily recognize which records it didn’t recognize. The “select for tag is not … set tag” logic ensures that the rule is run at most once for every record. It is not strictly necessary but it eases the burden on the CPU.